Warning: Constant WP_MEMORY_LIMIT already defined in /home/irawan/public_html/wp/wp-config.php on line 91
Tutorial – Irawan's blog

Category: Tutorial

  • Reverse Lens Macro Photography

    Reverse Lens Macro Photography

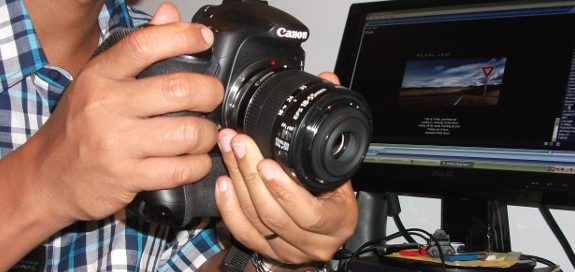
    Doing macro photography could be very fun as you can create a photo that your eyes won’t see in everyday life or bare eyes. It requires a special lens to capture a tiny object as a close up in details. But I just learned recently that you can do a macro photography without special pricy lenses and get a way around it. One of my photographer friends mentioned to me the other week that we can do a macro photography with a reversed lens. I was not sure what he meant at that time but he said it’s literally just reversing your lens back to front.

    Not going to elaborate the science of how the reverse lens work but its pretty cool (you can see the science here: https://stephenelliot.com/2007/05/15/reverse-lens-macro-photography-tutorial/). You can just hold your lens back to front against the camera or buy a special reverse lens mount.

    So then I did an experiment on it and the result is surprised me, better than I thought. This experiment I used a standard cheap lens  kit EFS 18-55mm, I don’t have any insect or something more exciting to capture so I just took whatever I have in the office :

    This is how I did it without reverse lens mount This is how I did it without reverse lens mount

    Experiment I:

    Gargamel | Focal length 55mm maximum closest Gargamel | Normal lens at focal length 55mm maximum closest Gargamel | Same lens setting but reversed and closed up Gargamel | Same lens setting but reversed and closed up

    Experiment II:

    Watch | Normal setting 55 mm Watch | Normal setting 55mm Watch | Reversed lens Watch | Reverse Lens

  • Having Fun with Custom BOKEH

    Having Fun with Custom BOKEH

    Bokeh is originally a Japanese word meaning ‘blur’ or ‘haze’ (Wikipedia). So, in photography, bokeh is used when you take a photo with a very shallow focus (big aperture), the area that are out of focus will be blurry. Bokeh is mostly used for night photography where the light is out of focus and blurry and give it a bit of artistic feeling on it. Recently, I made an experiment with custom bokeh shapes with Canon 50mm f/1.8 lens.

    How?

    Basically, all we need to do is just covering the lens with shaped filter in black. I use lens cup with whole on it and put my custom shaped filter behind it: simple and save place in your camera bag. Another way is you could make a filter that you can put on top of your lens like most tutorial on youtube do. Or you can buy factory made custom bokeh filters, neatness guarantee but at the moment, I’m showing you my DIY filters.

    Here are what I did, would be more shopisticated when the lights are more colorful and make it in video with movements. Will wait til the wet season gone and can not wait for Mindil Beach opening or Territory Day with lots of fireworks:) :

    Here are the results:

    Bokeh no filter
    Bokeh No filter
    Bokeh with broken heart shaped filter
    Bokeh with question mark shaped filter
    Bokeh with question mark shaped filter
    Bokeh with positive shaped filter
    Bokeh with star shaped filter
    Bokeh with star shaped filter

    And this is what the filter looks like:

    DIY Cutom Bokeh Filter
    DIY Cutom Bokeh Filter