Warning: Constant WP_MEMORY_LIMIT already defined in /home/irawan/public_html/wp/wp-config.php on line 91
Articles – Page 2 – Irawan's blog

Category: Articles

  • Split Level (Over-Under) Water Photography

    Split Level (Over-Under) Water Photography

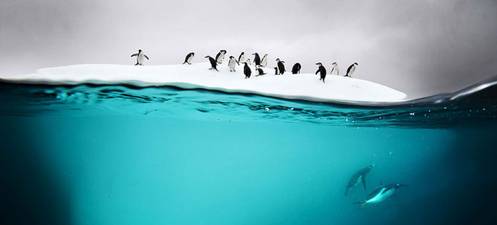
    Not only because I myself enjoy scuba diving and snorkeling, I like to explore any photography styles related to what I enjoy doing. Split Level Underwater photography is one of them. It’s also known as ‘over-under’ or ‘split-shots’ an amazing technique to take an underwater photo but include what’s above the water as well. So its a half way split between water and the air.

    They often are taken with wide angle or fisheye lenses with big dome port to capture both sides. To be able to capture both side clearly it’s better to use small aperture for the clear focus and best shot in a shallow and calm water. This technique could be tricky as the air and water has different index of refraction. To understand the science deeper, here’s the tutorial on how to do it by Jonathan Bird.

    Here are some amazing samples of Split Level or Over-Under photography, David Doubilet is one of the most outsanding underwater photographers with this technique:


    David Doubilet | Southern Stingrays Grand Caymand Island


    David Doubilet


    David Doubilet


    Tim Grollimund


    Meanwhile in the Philippines


    Octopus, Italy | Pasquale Vassallo


    Lionsman Jelly by Native Marine


    Kona Village Resort, Big Island, United States


    Mahout Elephant Underwater – Best photos National Geographic August 2010 – Cesare Naldi


    Baby green sea turtle French Polynesia – by David Doubilet


    Photo by Kelly Broaken


    Bunaken, Sulawesi, Indonesia – photographer unknown


    Shawn Jackson


    And here are some of the big buggers to shoot it with :

    David Doubilet on assignment Grand Cayman Island


    Dome Port


    Ikelite dive housing


    Big 8 inch Dome Port Ikelite


    And I have to share this interview of David Doubilet going through one by one of his best shots at the The World We Explore- David Doubilet Zeitgeist Americas 2012. And yes, he mentioned Raja Ampat of West Papua is like a dream place and I wish I will be able to go there someday:

  • Outex

    Outex

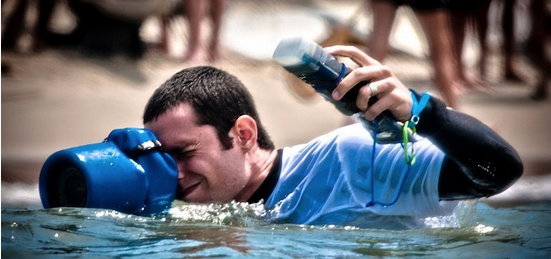
    If you like to take adventure photography and think that GoPro or other action cameras can not do enough but don’t want to spend more than what your DSLR camera cost for underwater housing, Outex is the answer.  It may sounds like a birth control product brand and works almost the same but it’s the coolest DSLR camera gear to protect the camera from water, mud, snow or dust in reasonably affordable price :)). It envelops any major DSLR and lenses brand like Canon, Nikon, Pentax, Sony, Sigma, Tamron etc.  To do a split level water photography will be very handy if you have the right lenses and Outex set for that as an alternative to expensive camera housing.

    Although you can use Outex for underwater photography up to 10m deep, it is not designed for scuba diving as its not  supporting the pressure. And to be able to use it underwater, it has to be installed properly. When you purchase from their website, it will be directed to which camera and lenses are you using so it will fit them properly. It’s an exciting new gear for adventure photography.

    Here are some photos of this Outex from many sources:

    Outex
    Outex


    Outex
    Outex underwater


    Outex-Waterproof-DSLR-Camera-Covers-1
    Outex


    Outex Split Level Photography
  • Bullet time effect – Still cameras array – Time slice

    Bullet time effect – Still cameras array – Time slice

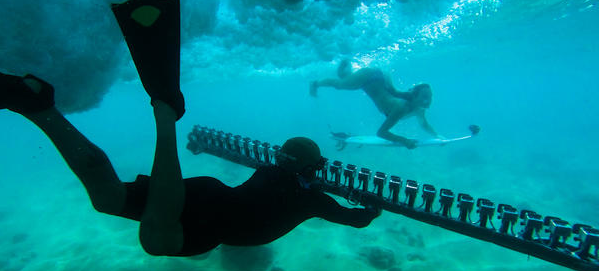
    I first thought about bullet time camera effect when watching Red Hot Chilli Peppers live at Slane when Kiedis jumped and the camera panned from one side to other. I could never think about the logic how the hell they do it with only one camera or software effects. The camera panning must be super fast to create that sort of motion, I thougth. Then I found out that Bullet time camera effect is what they used, its a scene created when a frozen motion is panned using gazillion of camera set up around the object.

    Here are some example of amazing examples beside the most famous one, Matrix movie bullet time scene and they are not the first time to use this technique:

    Time-Slice Films Demo Reel 2009 (Featured above)

    The Gadget Show – Bullet Time / Time Slice Shot – Suzi Perry

    Really Bend it Like Backham

    The 30 GoPro Bullet Time Rig – K.Flay Music Video Mini-Doc

    LA Times: Explained

    Rip Curl: and behind the scene

    Time Slice with Wuon Gean Ho

    A Moment In Time

    On Smash Live – Behind The Scenes – GoPro Array Drum Shoot

    My GoPro Array

    My GoPro Array from Marc Donahue on Vimeo.

    So You Think You Can Dance – Time-Slice Moments

    Legendary surf photog Larry Haynes films GoPro athlete @alanaRblanchard with the GoPro array

    Larry Haynes and @alanaRblanchard
    Larry Haynes and @alanaRblanchard
  • Reverse Lens Macro Photography

    Reverse Lens Macro Photography

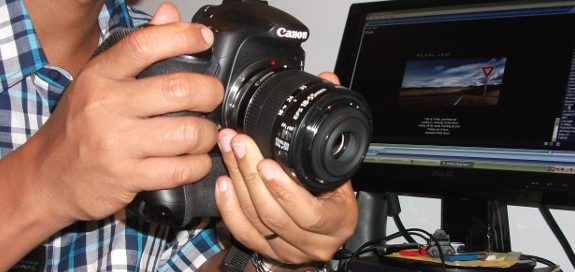
    Doing macro photography could be very fun as you can create a photo that your eyes won’t see in everyday life or bare eyes. It requires a special lens to capture a tiny object as a close up in details. But I just learned recently that you can do a macro photography without special pricy lenses and get a way around it. One of my photographer friends mentioned to me the other week that we can do a macro photography with a reversed lens. I was not sure what he meant at that time but he said it’s literally just reversing your lens back to front.

    Not going to elaborate the science of how the reverse lens work but its pretty cool (you can see the science here: https://stephenelliot.com/2007/05/15/reverse-lens-macro-photography-tutorial/). You can just hold your lens back to front against the camera or buy a special reverse lens mount.

    So then I did an experiment on it and the result is surprised me, better than I thought. This experiment I used a standard cheap lens  kit EFS 18-55mm, I don’t have any insect or something more exciting to capture so I just took whatever I have in the office :

    This is how I did it without reverse lens mount This is how I did it without reverse lens mount

    Experiment I:

    Gargamel | Focal length 55mm maximum closest Gargamel | Normal lens at focal length 55mm maximum closest Gargamel | Same lens setting but reversed and closed up Gargamel | Same lens setting but reversed and closed up

    Experiment II:

    Watch | Normal setting 55 mm Watch | Normal setting 55mm Watch | Reversed lens Watch | Reverse Lens